Restoring and Painting Some Great Old 1980’s Citadel Figures
After a recent visit to the games shop on Cooper Street, War & Hobby I came across a few old box sets of Citadel figures, Set 4 Runequest Aldryami and some old Citadel miniatures. Excellent I thought time to get my old school painting cap back on and get stuck in to them.
I also got a box set of Citadel Orcs ! the figure quality is excellent for the time these figures were released. The depict old style non heroic looking Warhammer esque Orcs of various classes from Shamen to Wizards to warriors and Thiefs.
I will report back on how well they both paint shortly, as I am in the process of stripping the old paint in favour of a makeover. When I get home I will upload some shots of me going through the process of preparing them, painting them and finally basing them.
The first part of the process was to coat them in pain removed for this I used B&Q’s own brand cheap and cheerful.
The bottle said leave for 30 minutes so I left it on the figures overnight. Next morning the figures looked white and all gunked up.

So I set about the task of cleaning the old paint and stripper off the figures with a toothbrush.
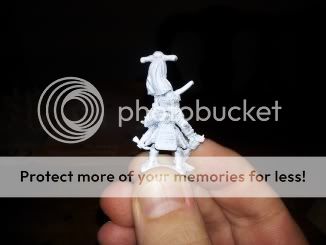
As the following pictures show the figures were looking really bad at this stage, full of melted paint and gooey stripper.
To help remove the sticky mess I squirted some hand soap onto the figure first which when agitated using the toothbrush it mixed with the stripper and old paint then washed off really well. I used the toothbrush to scrub the nooks and crannies of the figure until 99% of the paint / stripper mess was removed form the miniature.
The figures are now looking much better and are ready for priming which I will do this evening.
Priming

Ok so I used the Army Painter white primer which in my opinion is the best, as its pigment saturation gives a great finish with minimum spraying. When you use a cheaper undercoat you find you have to spray more to get an even coverage. Then because you have had to spray more you get the figure dripping with paint and which looks very poor when you start to paint over it.


I spray from about 12″ away and use short “Blasts” of colour and keep turning the models, I usually go over each model twice both from the top and sides so primer gets into the figure detail.

Now the figures are primed I will move on to the various base colours and washes

Base Colors & Washes
I waited for an house to let the primer dry then started the process of adding the base colours. I use a mix of Valego Game colour paint and Games Workshop washes.
I first add a base colour usually the skin tone, using a 1-1 mix of green for the hobgoblens and water, this gives me a good milky thinkness to work with. I also coat the whole brush with pain to that the long bristles provide a reservoir of pain while I am working.

Hobgoblin Beastmaster

Hobgoblin Sneak
Once I have a base colour I then “Wash” it with a darker shade to add a 3D look to the figure, I will highlight later after the base coats and shadow have been added.

Hobgoblin Rear

Various Hobgoblins
Additional Base Colors & Washes
As I continue to add base colours I build up the figure from inside out, so skin followed by tunic, followed by armour and boots and so on untill the last elements I will base coat and wash will be the outer garments. This will end the shading process and I will carefuly paint in more detail.

Hobgoblin Shaman

Hobgoblin Shaman Rear

Hobgoblin Spearman with Red Samuri style Armour

Hobgoblin Asagi Style Spearman in Red Armour
More Colour & Dip
In thes enext few pictures I have added more colour, provided some highights and used the Army Painter Dip to fill shadow. Regarding the Dip I do not Dip I lightly brush, then remove excess, otherwise the figure becomes to dark when dry

Hobgoblin Spearman dipped based no highlights

Hobgoblin Beastmaster Dipped based no Highlights


